Your display graphic isn’t complete once it comes out of the printer. In all likelihood, it still needs to be cut, slit, folded, laminated, assembled, packed or receive some other finishing touches. This process – the final step between printing and shipping – is known as post-press. A lot of people forget or underestimate the post-press process, but your graphic isn’t ready for viewing without it.
So what does post-press – also known as finishing – involve exactly? The term encompasses anything that happens to your graphic after it comes off the printer. Below are a few common finishing options:
Laminating
Whether or not a graphic goes through our lamination department depends on its application. Overall, laminates protect your graphic from water, tears, dirt and general damage but they also serve other purposes:
- Changing the reflection finish from gloss, luster or matte.
- Increasing rigidity and durability.
- Improving scratch and damage resistance for shipping, cutting or handling.
- Adding texture.
- Preventing slips
- Adding special effects like glitter, hologram, mirror, etc.
- Adding functionality like dry erase, anti-graffiti or longer lasting UV protection.
Cutting or Routing
All printed graphics need to be cut to their final. There are a variety of methods to die cut or route your graphic based on its material, thickness, shape and quantity:
- Routing: This cutting process uses a rapidly rotating bit to plunge into the material and then follows the desired cutting path create particular shapes and holes. Router cutting is most commonly used for cutting thick or rigid plastic materials.
- Die cutting: There are two different die cutting processes:digital die cutting and steel rule die cutting. Both cut a graphic by pressing a sharp blade into the printed material along the desired cutting path.
- Digital die cutting uses a computer controlled CAD table to drag a small blade around the graphic to cut the shape. It’s is great for short run jobs.
- Steel rule die cutting uses a large, long blade bent to the desired finished shape and is pressed into the material all at once, similar to a stamping process. This process is fast but requires a custom made die for each job, making it best for long running jobs.
- Laser cutting: As its name implies, laser cutting uses a laser to cut elaborate shapes not achievable with a die cutter. Lasers can cut thin materials quickly but require a high power laser to cut thick materials, making them generally slower on throughput.
- Shear cutting: Also known as guillotine or square cutting, shear cutting uses a straight, long blade to cut numerous sheets at once. This process only cuts in straight lines, so it’s limited to rectangle shapes.

Assembly
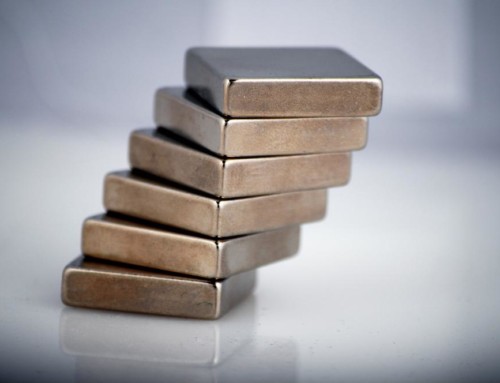
The final step of the post-press process, assembly brings all elements of your graphic together so it resembles what it will look like at its final destination. Because your artwork will be shipped after production, your printing partner usually can’t assemble your displays completely. However, NGS Printing provides light assembly work that won’t interfere with the fulfillment process, such as adding mounting tape, applying magnets or hardware, poly-bagging, mounting or custom packing.
The importance of post-press
Post-press is the point at which your graphic truly comes together, transforming a printed square sheet into an attractive custom cut and functional graphic. That said, waiting to consider post-press production until your print job is complete is a recipe for disaster. From the start, you’ll need to consider your application and what lamination attributes your graphic may need, which cutting method to design your artwork for, and if your printing partner will assist you in assembly to minimize mistakes at the very end.
[/fusion_builder_column][/fusion_builder_row][/fusion_builder_container]